


Mini Split Installation in Winter Springs, FL
Discover why mini splits are ideal for Winter Springs homes. Enjoy efficient cooling, individual room control, and improved air quality with ductless systems.


Choosing a properly installed Mini Split system is one of the most effective ways to improve comfort, lower energy bills, and add flexible zoning to Winter Springs homes. Van Eddies Heating & Air Conditioning specializes in ductless Mini Split installation in Winter Springs, FL.
Why mini-splits are a strong fit for Winter Springs homes
- Winter Springs has hot, humid summers and relatively mild winters. Mini-splits provide efficient, targeted cooling that reduces runtime compared with oversizing central systems.
- Zoning and individual room control help manage humidity and comfort in Florida homes where different rooms experience different heat loads.
- Ductless designs avoid duct leakage and the energy losses associated with ductwork in older or retrofitted homes.
- Modern inverter-driven mini-splits maintain steady temperatures and higher SEER ratings, which is important under Florida energy code expectations and to reduce monthly cooling costs.
Common reasons Winter Springs homeowners choose mini-splits
- No existing ductwork or costly duct replacement
- Room additions, finished attics, converted garages, or sunrooms that need independent temperature control
- Desire for improved indoor air quality by avoiding contaminated ducts
- Need for quiet operation in bedrooms, home offices, or media rooms
- Supplemental heating during mild Florida winters with heat pump mini-splits
Common mini-split types and placements
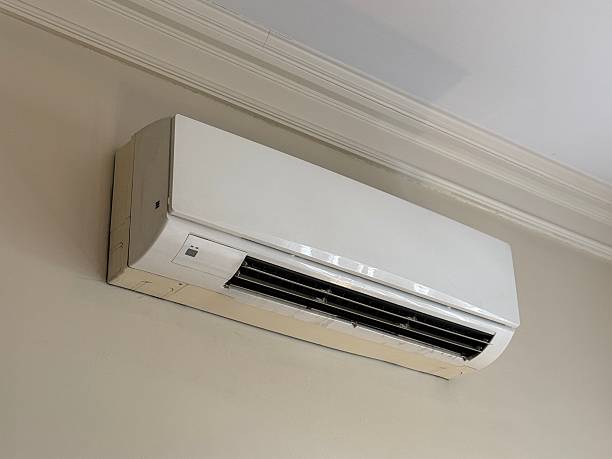
- Single-zone wall-mounted units: Most common for bedrooms, living rooms, or offices.
- Multi-zone systems: One outdoor unit with multiple indoor heads for whole-house zoning without ducts.
- Floor-mounted and ceiling cassette heads: For rooms with limited wall space or where even airflow distribution is needed.
- Outdoor condensing unit placement: Typically on a concrete pad or elevated bracket near a utility area, clear of debris and with adequate airflow.
Typical mini-split problems that proper installation prevents
- Insufficient capacity from incorrect load calculations
- Short cycling due to improper line sizing or electrical supply
- Poor condensate management causing indoor leaks or mold growth
- Inefficient operation due to incorrect refrigerant charge
- Noise and vibration from unsecured outdoor or indoor mounting
- Obstructed airflow from poor indoor head placement
What to expect during a professional onsite assessment
- Inspect the structure: Evaluate wall construction, window orientation, attic insulation, and sun exposure to determine room-specific loads.
- Room-by-room measurements: Record square footage, ceiling height, occupancy, and internal heat gains from appliances or lighting.
- Evaluate existing electrical capacity: Check service panel capacity and available breaker spaces for the new outdoor unit and disconnect.
- Review aesthetic and placement preferences: Discuss preferred indoor head locations, refrigerant line routing, and outdoor unit location for minimal visibility and optimal performance.
- Identify any structural or code constraints: Note where drilling through historic or special exterior materials may require special flashing or reinforcement.
Load calculations and unit selection
- Accurate load calculation is critical. Van Eddies Heating & Air Conditioning recommends Manual J or equivalent room-by-room heat load analysis, not rule-of-thumb sizing.
- Load calculations determine both cooling and heating capacity needs. In Winter Springs, sensible and latent loads matter because high humidity increases latent load.
- Unit selection includes matching SEER and HSPF (for heat pump models), verifying inverter compatibility, and choosing the appropriate multi-zone or single-zone configuration based on layout.
- Consideration of future expansion: If you may add a zone later, selecting a compatible multi-zone outdoor unit now may reduce future costs.
Electrical and refrigerant line requirements
- Electrical supply: Most residential outdoor units require a dedicated 240V circuit; smaller single-zone systems may operate on 208/230V. An electrical load review ensures the service panel can handle the new demand.
- Disconnect and surge protection: Local code often requires a fused disconnect at the outdoor unit and may require surge protection for inverter-driven systems.
- Refrigerant lines and conduit: Properly sized copper lines must be run between indoor and outdoor units. Lines are insulated and routed through a small penetrative opening for a neat finish.
- Line length and elevation limits: Manufacturers specify maximum refrigerant line lengths and elevation differentials that affect system performance. Installers must respect these limits or install additional components like line length compensation.
- Condensate management: Indoor units produce condensate that must be routed to a drain or condensate pump. Proper sloping and trap installation prevents backups.
Permit and code considerations in Winter Springs, FL
- Winter Springs is in Seminole County; installations typically require a mechanical permit and inspection. Florida building code also applies, including energy efficiency sections that can influence required SEER ratings or installation methods.
- Local codes may require seismic straps or windstorm anchoring for outdoor units in certain zones and specific flashings for wall penetrations to maintain envelope integrity.
- Licensed HVAC contractors are generally required to pull permits and arrange inspections. Van Eddies Heating & Air Conditioning includes permit management as part of a professional install to ensure the system passes final inspection.
Step-by-step installation proceduresPre-install preparation
- Confirm final equipment selection and obtain required permits before any drilling or electrical work.
- Schedule a pre-install walk-through with the homeowner to confirm access, placement, and any homeowner preferences regarding concealment of lines.
- Prepare area: Clear vegetation, verify stable pad or bracket mounting area, and ensure indoor mounting surfaces are structurally sound.
Physical installation steps
Install outdoor condensing unit
- Place on a level concrete pad or anti-vibration bracket elevated above potential standing water.
- Ensure a minimum clearance for airflow per manufacturer guidelines and local code.
- Secure unit to the pad or bracket to prevent tipping or movement during storms.
Mount indoor head(s)
- For wall mounts, cut a small, neat 2 to 3 inch hole through the wall for refrigerant lines, electrical, and condensate.
- If using ceiling cassette or floor-mounted units, prepare appropriate framing or recesses and ensure structural support.
- Anchor indoor heads to studs or backing for a secure installation.
Run refrigerant lines, electrical, and condensate piping
- Pull pre-insulated copper lines and electrical conduit through the wall penetration.
- Use a protective sleeve or flashing for exterior penetrations, seal tightly for thermal and moisture control.
- Install condensate line with correct slope to exterior drain or connect to a condensate pump if necessary.
Connect refrigeration and evacuate the system
- Make flare or brazed connections per manufacturer best practices.
- Evacuate the refrigerant lines with a vacuum pump to remove moisture and noncondensables.
- Charge the system to manufacturer-specified refrigerant levels, accounting for line length if factory charge is based on a standard length.
Final electrical connections and safety devices
- Install a disconnect and connect the outdoor unit to the dedicated circuit.
- Connect indoor unit low-voltage control wiring and verify communication between indoor and outdoor components.
- Install surge protection or additional safety devices as required by local code or homeowner preference.
Secure and conceal lines for a clean finish
- Use chases, raceways, or painted covers to conceal exterior lines where needed for aesthetics.
- Properly flash and caulk all wall penetrations to maintain the building envelope.
Post-install testing and balancing
- Leak test: Pressure test refrigerant lines to check for leaks before system charging.
- Refrigerant verification: Confirm refrigerant charge with manufacturer method, adjusting for line length and ambient conditions.
- Airflow balancing: Measure and adjust airflow at each indoor head to ensure manufacturer-specified CFM and even distribution across zones.
- Electrical checks: Verify correct voltage, amperage, and that the outdoor disconnect operates properly.
- Temperature split and humidity testing: Measure supply and return air temperatures, and assess dehumidification performance. For Winter Springs, verifying latent removal is important given local humidity levels.
Homeowner orientation and documentation
- System operation overview: Explain thermostat or remote control features, mode selection, scheduling, and zone management.
- Maintenance essentials: Show how to access and clean washable filters, advise on frequency of cleaning in humid Florida conditions, and recommend annual professional maintenance.
- Warranty and paperwork: Provide manufacturer warranty information, installation documentation, permit sign-off, and maintenance recommendations for keeping warranties valid.
- Troubleshooting basics: Explain common indications such as error codes, condensate alarms, or unusual noises and what immediate steps homeowners should take.
Common installation issues and how professionals prevent them
- Undersized or oversized systems: Professional load calculations prevent reduced comfort, humidity problems, and inefficiencies.
- Improper refrigerant charge: Certified technicians use vacuum and weighing equipment to ensure correct charge for optimal performance and compressor life.
- Poor condensate drainage: Proper design and installation of condensate routing or pumps avoid indoor water damage and mold growth.
- Incorrect electrical sizing: Ensuring a dedicated circuit and correct breaker sizing prevents nuisance trips and equipment damage.
- Aesthetic and structural damage: Using manufacturer-approved penetrations, flashing, and concealment avoids water intrusion and preserves home value.
Maintenance tips to protect your investment in Winter Springs
- Clean washable filters monthly during peak cooling season to maintain airflow and indoor air quality.
- Schedule annual professional tune-ups that include refrigerant checks, electrical inspection, condensate drain cleaning, and system calibration.
- Keep outdoor unit area clear of vegetation, mulch, and debris to ensure proper airflow and reduce the risk of corrosion.
- Monitor for early signs of issues: unusual noises, reduced cooling, increased humidity, or higher energy bills often indicate the need for service.
- Consider a maintenance plan that documents service history and ensures seasonal inspections for both cooling and heating functions.
Energy savings, rebates, and financing considerations
- State and federal rebates periodically change and may apply for high-efficiency SEER or inverter-driven mini-splits; Van Eddies Heating & Air Conditioning helps homeowners identify available local incentives during the planning stage.
- Utility programs in Florida or Seminole County sometimes offer rebates for energy-efficient heat pumps or ductless system upgrades. Eligibility often depends on equipment efficiency ratings and professional installation.
- Financing options: Many homeowners choose financing to spread investment over time. Financing offers may be available through third-party providers and are subject to approval. Discussing financing early helps determine the scope and timing of upgrades.
Why professional installation matters
- Mini-splits deliver their promised efficiency and comfort only when matched to accurate load calculations, installed with proper refrigerant charging, and integrated electrically and structurally to the home.
- Professional installers are familiar with local Winter Springs permit processes, code requirements, and best practices for hurricane and windstorm considerations.
- Proper installation reduces the likelihood of premature component failure, costly callbacks, and voided warranties.
How Van Eddies Heating & Air Conditioning approaches mini-split installations in Winter Springs
- We follow a process that begins with a detailed site assessment and load calculation, continues with professional equipment selection, and ends with methodical installation and homeowner orientation.
- Installations are performed by trained technicians who understand local climate impacts on cooling and humidity control and who follow manufacturer-prescribed charging and testing procedures.
- Permits and inspections are coordinated and documented so systems meet local code and pass final inspection.
Signs you should consider replacing or adding a mini-split
- Rooms that never reach desired temperatures despite running existing systems.
- High summer utility bills for rooms on the same thermostat.
- Recent home additions or remodeled spaces without ductwork.
- Allergies or indoor air quality concerns tied to old or leaky ducts.
- Desire for individual control of sleeping areas, home offices, or sunrooms.
Long term benefits of correctly installed mini-splits in Winter Springs homes
- Improved comfort with precise temperature and humidity control.
- Lower operating costs thanks to inverter-driven compressors and higher SEER ratings compared with older central systems.
- Greater flexibility for home additions or reconfigured spaces without the cost of ductwork.
- Enhanced indoor air quality by avoiding dusty, mold-prone duct systems.
- Quiet operation and discreet indoor head profiles that integrate with interior design.
Final notes on planning your installation
- Treat the installation as a planned home improvement project: accurate assessment and proper equipment selection are more important than lowest upfront cost.
- Factor climate and humidity into equipment selection and placement to ensure the system delivers comfort during Winter Springs summer highs.
- Professional installation protects warranties, ensures code compliance, and maximizes system efficiency and longevity.
Maintenance Plan
Our comprehensive 21-point Tune-up maintenance plan ensures your systems run smoothly year-round, with regular check-ups and priority support.
Heat Pump/ AC Tune-Up
Our Heat Pump/AC Tune-Up ensures peak performance by cleaning coils, checking refrigerant, lubricating parts, and inspecting electrical components. This boosts energy efficiency, extends system life, prevents breakdowns, and lowers utility bills while maintaining optimal home comfort year-round.
Sign Up Today!

Check And Adjust Thermostat As Needed
Check Filter; Replace/Wash As Needed
Check Voltages
Check All Wiring And Connections
Check Starting Contractor
Check All Capacitors
Measure All Motor Amperages
Check Operation of Unit Safety Controls
Check Superheat/Hot Gas Temperature
Check Refrigerant; Charge As Needed
Check Evaporator Condition; Clean As Needed
Check For Rubbing Refrigerant Lines
Check And Clean Condenser Coil
Check Air Temperature Across Evaporator Coil
Lubricate Any Moving Parts
Check Fan Blades For Cracks
Check Condenser Temperature Rise
Check Condensate Drain Or Pump
Check Fuse Disconnects
Check Condition of Ductwork
Wax Top Of Unit
Furnace Tune-Up
Our Furnace Tune-Up optimizes heating efficiency through coil cleaning, burner inspection, airflow checks, and safety control testing. This service prevents costly repairs, enhances fuel efficiency, extends equipment lifespan, and ensures reliable warmth during cold months.
Sign Up Today!
Check And Adjust Thermostat As Needed
Check Filter; Replace/Wash As Needed
Check For Gas Leaks At Furnace
Clean Burners And Controls
Check Safety Controls; Adjust As Needed
Check Flame Sensors
Clean Equipment Interior
Check Fan Control
Check Blower Speed And Operation
Check All Wiring And Connections
Check Connection Of Flue Pipe and Draft Diverter
Check Ignition System
Check Heat Exchanger
Check Complete Furnace Cycle
Lubricate All Moving Parts
Check Pressure Switches And Vent Blower/Draft Inducer
Check Temperature Of Vent Air
Check Air Temperature Across Furnace
Check Condition Of Ductwork
Measure Carbon Monoxide
Clean Equipment Exterior
Customer Testimonials
Discover why our customers love us through their heartfelt testimonials.